WORK IN PROGRESS.. Always changing, updating, and fixing….
***Official Notebook Link
Check out our latest video using Deofurm – Unofficial – Skrillex, Fred again.. & Flowdan – Rumble [AI Visuals]
Deforum Stable Diffusion (Design Forum) builds upon Stability AI’s Stable Diffusion Model and add’s a lot of additional functionality not seen in the default notebook by Stability. Since Stability AI (blog post) has released this model for free and commercial usages a lot of amazing new notebooks have come out that push this technology further.
Deforum Stable Diffusion (DSD) as of this writing has additional features such as animation in the form of 2D and 3D, Video Init, and a few other masking options.
It’s magic. And also, free. (!)
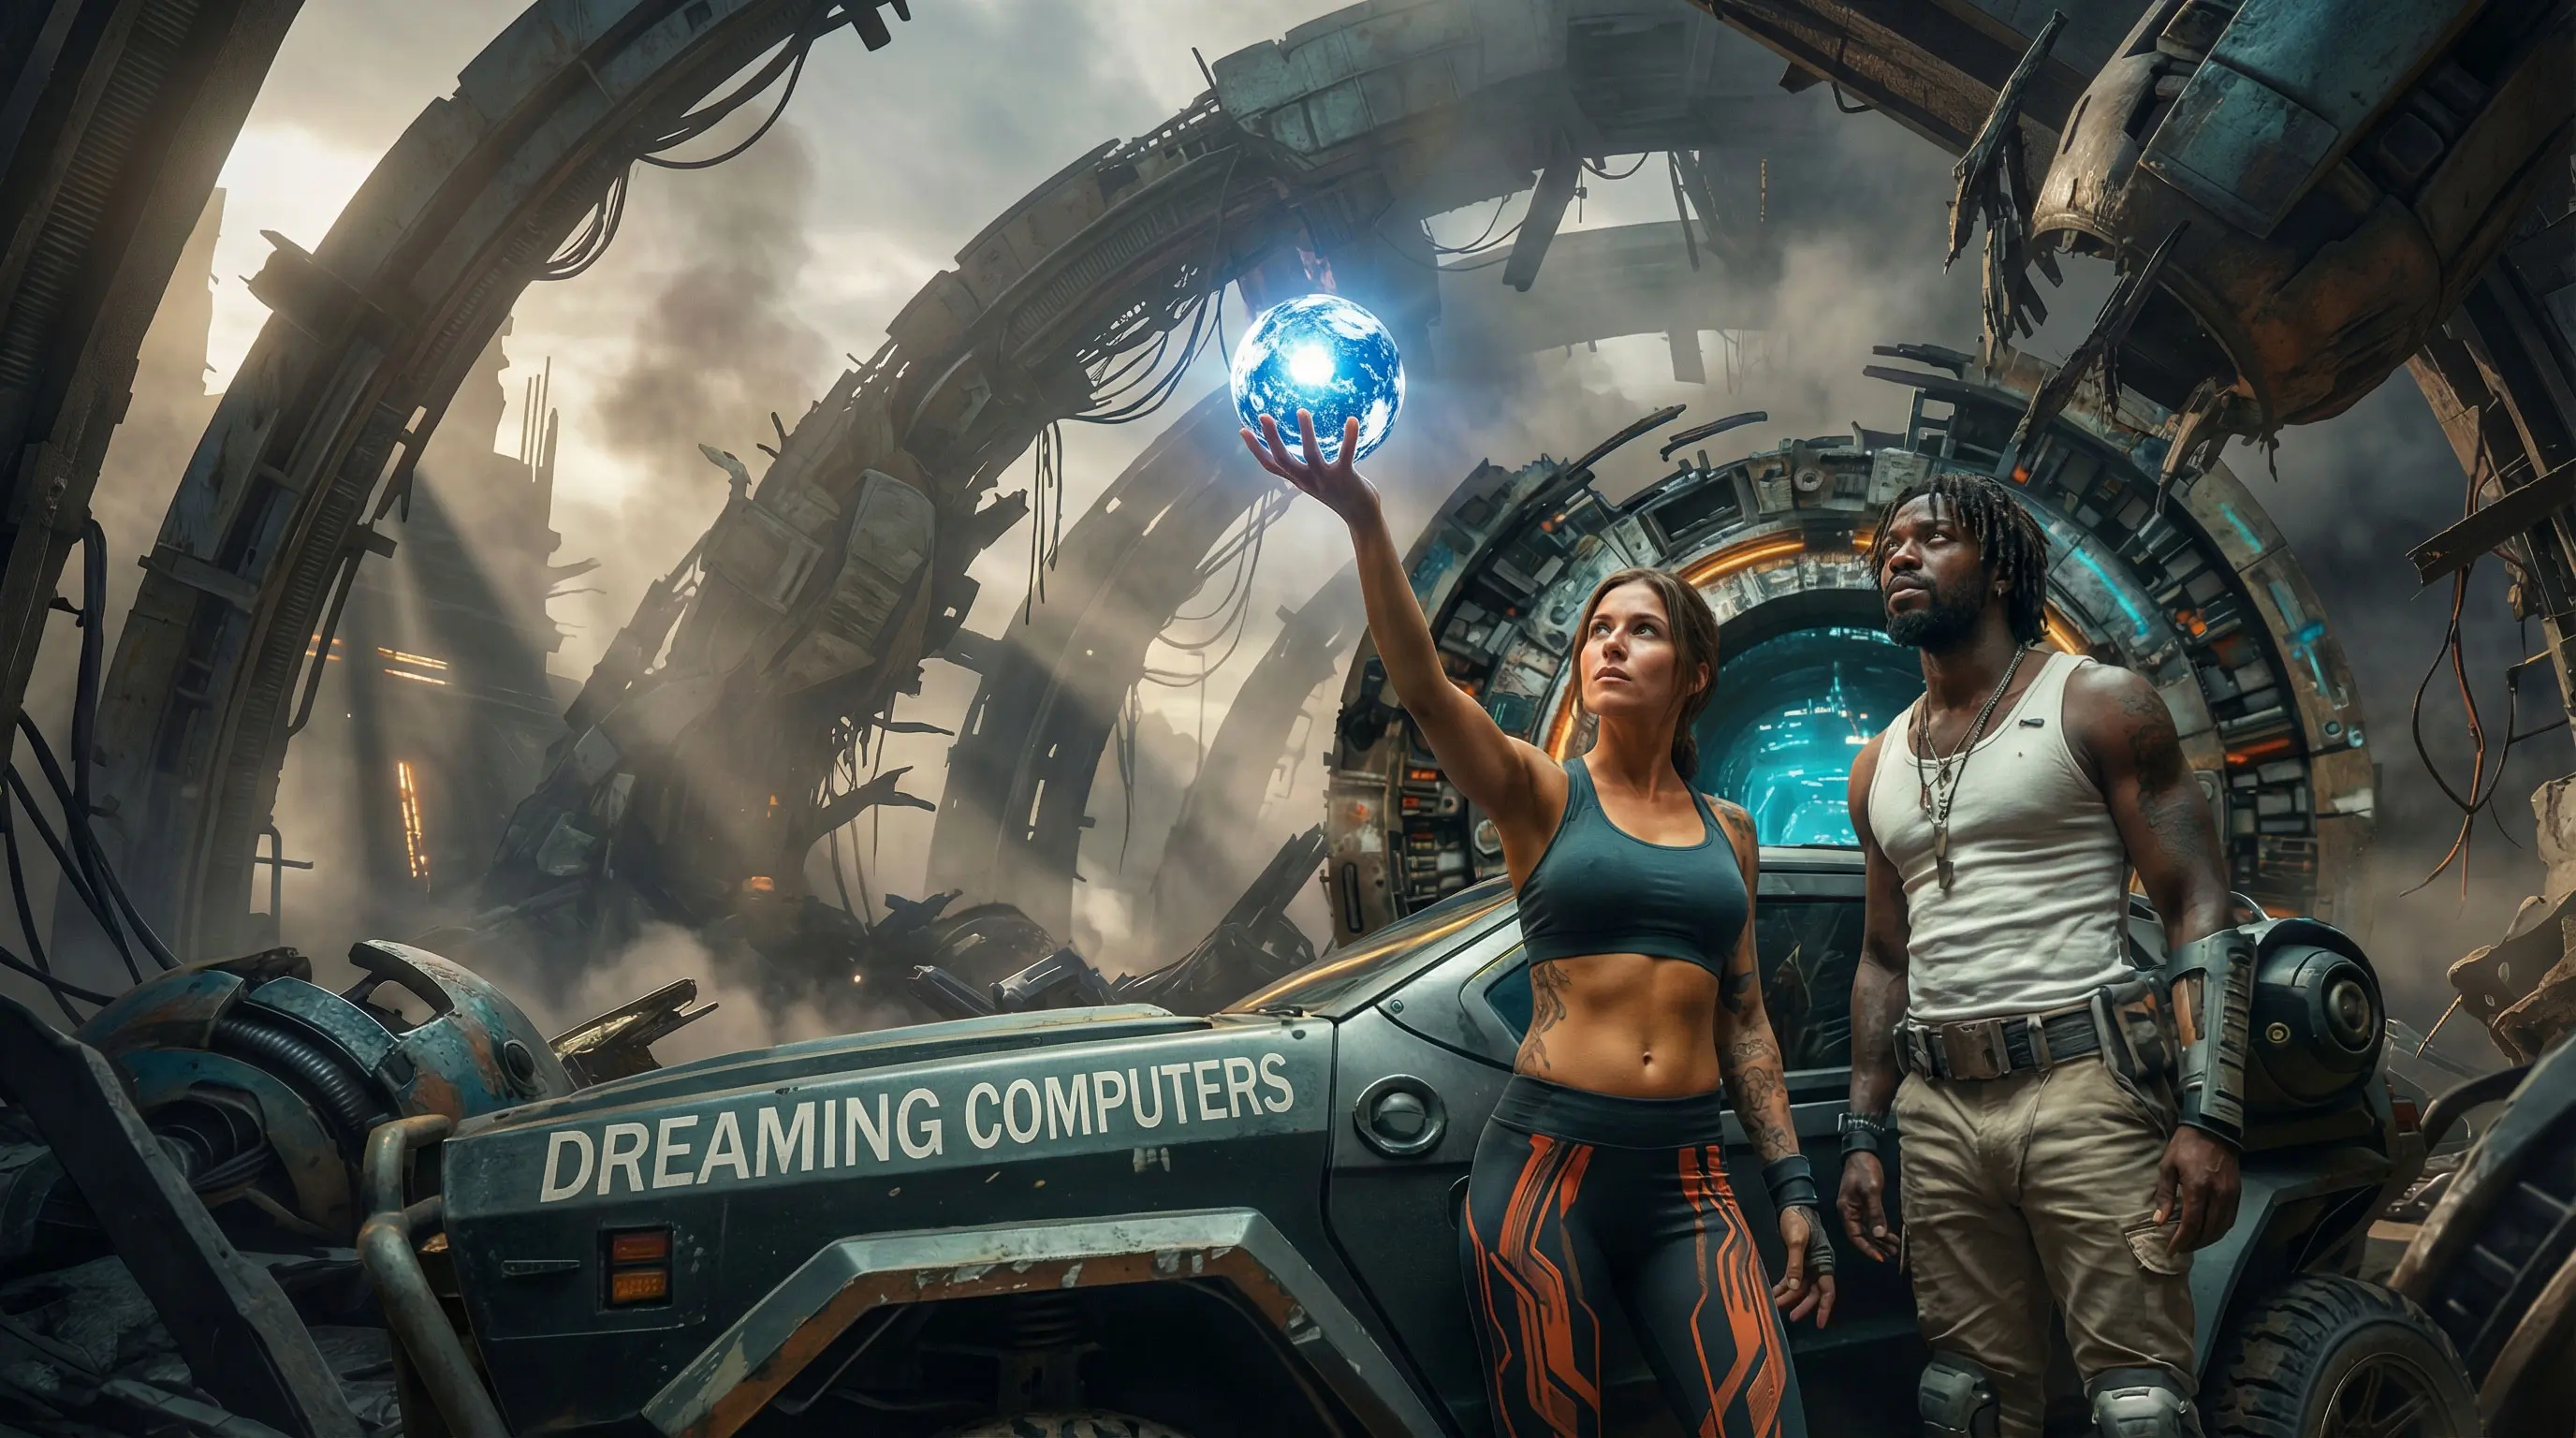
The image above was created with DSD using just the text prompt:
“ultra detailed portrait Burning Man festival in the Black Rock Desert, steampunk burning man artwork, night time with fractal clouds, volumetric lighting, cinematic portrait”
Here is a bit more info on whats going on..
“The model itself builds upon the work of the team at CompVis and Runway in their widely used latent diffusion model combined with insights from the conditional diffusion models by our lead generative AI developer Katherine Crowson, Dall-E 2 by Open AI, Imagen by Google Brain and many others. We are delighted that AI media generation is a cooperative field and hope it can continue this way to bring the gift of creativity to all.
The core dataset was trained on LAION-Aesthetics, a soon to be released subset of LAION 5B. LAION-Aesthetics was created with a new CLIP-based model that filtered LAION-5B based on how “beautiful” an image was, building on ratings from the alpha testers of Stable Diffusion. LAION-Aesthetics will be released with other subsets in the coming days on https://laion.ai.” – Source Stability.ai
[products limit=”4″ columns=”4″ orderby=”popularity” class=”quick-sale” ]
This quick user guide is intended as a LITE reference for different aspects and items found within the Deforum notebook.
It is intended for version 0.4, which was released 9/11/2022
Most documentation has been updated to reflect changes in version 0.5 released on October 1st, 2022.
This document is created from additional resources and should be used as a reference only. Some things may get outdated or things might change and we will make our best effort to keep things update and add new things as they come.
****Please note this document also shares a lot of information from the Disco Diffusion Document that I was kindly allowed to use and reuse for this document by Chris Allen (@zippy731 on twitter)
Launch the Google Colab Notebook here.
Deforum Stable Diffusion (DSD) (currently version 0.4) is intimidating and inscrutable at first. Just take it in small steps and you’ll make progress.
This guide assumes you understand the basics of accessing and running a notebook using Google’s Colab service. If you don’t, please check the appendix for some recommended resources to get that understanding.
DSD does not come with the stable diffusion model ready to download and you will have to do this process manually.
You will need to create an account on HugginFace first and then after that you can download the model.
Next steps are to upload this model to your Google drive folder. Since you are running Google Colabs I’m going to assume you know you have a Google Drive for file storage.
This should complete the first step of getting ready to fully run the DSD Notebook.
**This may change from time to time so please look at the notebook on how to properly get the model.
When you launch the DSD notebook in Colab, it’s already set up with defaults that will generate a lighthouse image like the one above. Before changing any of the settings, you should just run all (Runtime\Run all) to confirm everything’s working. Colab will prompt you to authorize connecting to your google drive, and you should approve this for DSD to work properly.
Afterward, DSD will spend a few minutes setting up the environment, and will eventually display a diffusion image being generated at the very bottom of the notebook. Once you’ve confirmed that all of this is working, you can interrupt the program (Runtime\Interrupt Execution) whenever you like.
Using Default Settings
After the initial setup, you can start creating your own images! There are many options, but if you want to just type phrases and use the default settings to generate images:
New to v0.5 are prompt weights and the ability to use a prompt from a model checkpoint. These are the examples taken from the notebook.
Prompt Engineering
This is the main event. Typing in words and getting back pictures. It’s why we’re all here, right? 🙂
In DSD, prompts are set at the very bottom of the notebook. Prompts can be a few words, a long sentence, or a few sentences. Writing prompts is an art in and of itself that won’t be covered here, but the DSD prompts section has some examples including the formatting required.
Phrase, sentence, or string of words and phrases describing what the image should look like. The words will be analyzed by the AI and will guide the diffusion process toward the image(s) you describe. These can include commas and weights to adjust the relative importance of each element. E.g. “ultra detailed portrai of a wise blonde beautiful female elven warrior goddess, dark, piercing glowing eyes, gentle expression, elegant clothing, photorealistic, steampunk inspired, highly detailed, artstation, smooth, sharp focus, art by michael whelan, artgerm, greg rutkowski and alphonse mucha .”
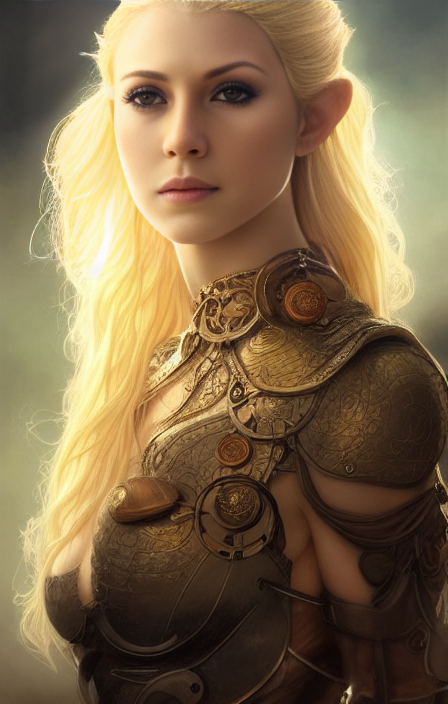
Notice that this prompt loosely follows a structure: [subject], [prepositional details], [setting], [meta modifiers and artist]; this is a good starting point for your experiments.
Developing text prompts takes practice and experience, and is not the subject of this guide. If you are a beginner to writing text prompts, a good place to start is on a simple AI art app like Night Cafe Studio, starry ai or WOMBO prior to using DSD, to get a feel for how text gets translated into images by GAN tools. These other apps use different technologies, but many of the same principles apply.
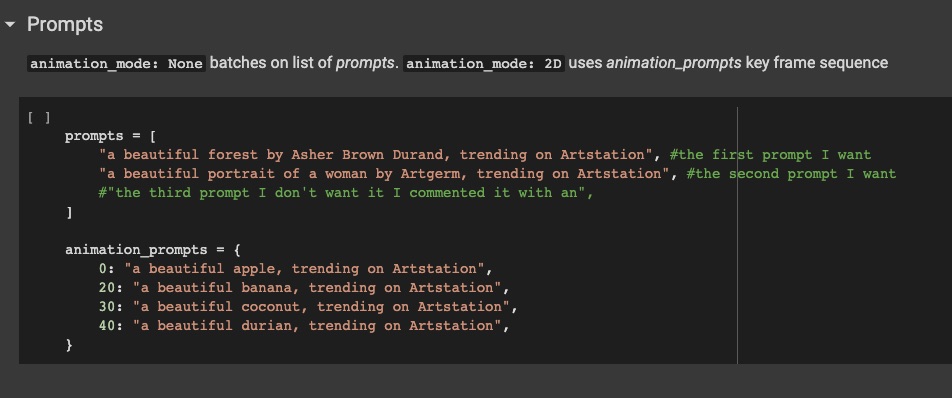
In the above example, we have two groupings of prompts: the still frames *prompts* on top, and the animation_prompts below. During “NONE” animation mode, the diffusion will look to the top group of prompts to produce images. In all other modes, (2D, 3D etc) the diffusion will reference the second lower group of prompts.
Careful attention to the syntax of these prompts is critical to be able to run the diffusion.
For still frame image output, numbers are not to be placed in front of the prompt, since no “schedule” is expected during a batch of images.
The above prompts will produce and display a forest image and a separate image of a woman, as the outputs.
During 2D//3D animation runs, the lower group with prompt numbering will be referenced as specified. In the example above, we start at frame 0: – an apple image is produced. As the frames progress, it remains with an apple output until frame 20 occurs, at which the diffusion will now be directed to start including a banana as the main subject, eventually replacing the now no longer referenced apple from previous.
Interpolation mode, however, will “tween” the prompts in such a way that firstly, 1 image each is produced from the list of prompts. An apple, banana, coconut, and a durian fruit will be drawn. Then the diffusion begins to draw frames that should exist between the prompts, making hybrids of apples and bananas – then proceeding to fill in the gap between bananas and coconuts, finally resolving and stopping on the last image of the durian, as its destination. (remember that this exclusive mode ignores max_frames and draws the interpolate_key_frame/x_frame schedule instead.
Many resources exist for the context of what a prompt should include. It is up to YOU, the dreamer, to select items you feel belong in your art. Currently, prompts weights are not implemented yet in deforum, however following a template should yield fair results:
[Medium] [Subject] [Artist] [Details] [Repository]
Ex. “A Sculpture of a Purple Fox by Alex Grey, with tiny ornaments, popular on CGSociety”,
A numerical prompt weight feature has been added to Deforum as a selectable feature. When enabled, the run will interpret the values and weights syntax of the prompt for better control and token presence. The numerical values are applied to all words before the colon, but parenthesis weights are coming soon. But there’s no explicit ‘negative prompt’ feature… Instead, all weights less than zero are added to the negative prompt automatically. Guess, what does it allow for? And what do you think, weights values adhere to MATH expressions for even more control!
Now with a master prompt like
eggs:`cos(6.28*t/10)`, bacon:`-cos(6.28*t/10)`
You can go back and forth with stuff in just one line of text!
Prompt weighting + MATH demo:
As stated before the notebook requires an Nvidia GPU to run and also that you have downloaded the current stable diffusion model and put it in the proper folder that your notebook references.
Google Drive Path Variables (Optional):
The notebook expects the following path variables to be defined: models_path and output_path. These locations will be used to access the Stable Diffusion .pth model weights and save the diffusion output renders, respectively. There is the option to use paths locally or on Google Drive. If you desire to use paths on Google drive, mount_google_drive must be True. Mounting Gdrive will prompt you to access your Drive, to read/write/save images.
Running this cell will download github repositories, import python libraries, and create the necessary folders and files to configure the Stable Diffusion model. Sometimes there may be issues where the Setup Environment cells do not load properly and you will encounter errors when you start the run. Verify the Setup Environment cells have been run without any errors.
Running this cell will define the required functions to proceed with making images. Verify the Python Definitions cell has been run without any errors.
In order to load the Stable Diffusion model, Colab needs to know where to find the model_config file and the model_checkpoint. The model_config file contains information about the model architecture. The model_checkpoint contains model weights which correspond to the model architecture. For troubleshooting verify that both the config and weight path variables are correct. By default the notebook expects the model config and weights to be located in the model_path. You can provide custom model weights and config paths by selecting “custom” in both the model_config and model_checkpoint drop downs. Sometimes there are issues with downloading the model weights and the file is corrupt. The check_sha256 function will verify the integrity of the model weights and let you know if they are okay to use. The map_location allows the user to specify where to load model weights. For most colab users, the default “GPU” map location is best.
Until this point, all of the settings have been related to creating still images. DSD also has several animation systems that allow you to make an animated sequence of stable diffusion images. The frames in the animation system are created using all of the same settings described above, so practice making still images will help your animated images as well.
There are 4 distinct animation systems: 2D, 3D, video and interpolation. All of the animation modes take advantage of DSD’s image init function, and use either the previously created frame (2D/3D) or a frame from a separate video (video) This starting image is injected into the diffusion process as an image init, then the diffusion runs normally.
When using any of the animation modes, temporal coherence between frames is an important consideration, so you will need to balance between the strength of the image init, the strength of the text prompt and other guidance, and the portion of the diffusion curve you will use to modify the image init.
The animation system also has ‘keyframes’ available, so you can change several values at various frames in the animation, and DSD will change direction. You can even update the text prompt mid-animation, and DSD will begin to morph the image toward the new prompt, allowing for some great storytelling power!
As of version 0.5 you can now use custom math functions.
Users may now use custom math expressions as well as typical values as scheduling for parameters that allow strings, such as zoom, angle, translation, rotation, strength_schedule, and noise” Many wave functions can now be achieved with simple instructions using “t” as a variable to express frame number. Please refer to the link provided for more info about math functions.
More Math Expression Details:
Users may now use custom math expressions as well as typical values as scheduling, such as zoom, angle, translation, rotation, strength_schedule, and noise. Many wave functions can now be achieved with simple instructions using t as a variable to express frame number. No more bothering with tables! Wherever there’s math, there’s a cheat sheet!
It was also suggested that if you change your strength schedule to also adjust your noise schedule. Sample starting points are:
st=0.9 | noise = 0.00
st=0.8 | noise = 0.01
st=0.7 | noise = 0.02
st=0.6 | noise = 0.03
st=0.5 | noise = 0.04
Amazing Math Expressions Doc from the team (link)
None, 2D, 3D or video animation options. Details in each section below. We also have a much deeper breakdown into the animation mode further below, so keep reading!
When selected will ignore the “none mode” prompts and refer to the prompts that are scheduled with a frame number before them. 3D mode will attempt to string the images produced in a sequence of coherent outputs. The number of output images to be created is defined by “max_frames”. The motion operators that control 3D mode are as follows:
“Border, translation_x, translation_y, rotation_3d_x, rotation_3d_y, rotation_3d_z, noise_schedule, contrast_schedule, color_coherence, diffusion_cadence, 3D depth warping, midas_weight, fov, padding_mode, sampling_mode, and save_depth_map. Resume_from_timestring is available during 3D mode. (more details below)
This feature allows extra parameters during 2D mode to allow a faux Roll, Tilt, Pan canvas function only found in 3D mode. Users may use angle control to simulate a 2.5D effect, using only a 2D canvas mode. It may be particularly helpful in local mode, when you’re low on vram. See Post (this post)[https://www.reddit.com/r/StableDiffusion/comments/xhnaaj/i_added_2d_perspective_flipping_to_the_deforum/].
Perspective flip demo:
Motion parameters are instructions to move the canvas in units per frame
The color coherence will attempt to sample the overall pixel color information, and trend those values analyzed in the 0th frame, to be applied to future frames. LAB is a more linear approach to mimic human perception of color space – a good default setting for most users.
HSV is a good method for balancing presence of vibrant colors, but may produce unrealistic results – (ie.blue apples) RGB is good for enforcing unbiased amounts of color in each red, green and blue channel – some images may yield colorized artifacts if sampling is too low.
The diffusion cadence will attempt to follow the 2D or 3D schedule of movement as per specified in the motion parameters, while enforcing diffusion on the frames specified. The default setting of 1 will cause every frame to receive diffusion in the sequence of image outputs. A setting of 2 will only diffuse on every other frame, yet motion will still be in effect. The output of images during the cadence sequence will be automatically blended, additively and saved to the specified drive.
This may improve the illusion of coherence in some workflows as the content and context of an image will not change or diffuse during frames that were skipped. Higher values of 4-8 cadence will skip over a larger amount of frames and only diffuse the “Nth” frame as set by the diffusion_cadence value. This may produce more continuity in an animation, at the cost of little opportunity to add more diffused content. In extreme examples, motion within a frame will fail to produce diverse prompt context, and the space will be filled with lines or approximations of content – resulting in unexpected animation patterns and artifacts. Video Input & Interpolation modes are not affected by diffusion_cadence.
Example:
The cadence number will always equal the final number of outputs, with the first of that group to be the diffused one.
FOV (field of view/vision) in deforum, will give specific instructions as to how the translation_z value affects the canvas. Range is -180 to +180. The value follows the inverse square law of a curve in such a way that 0 FOV is undefined and will produce a blank image output. A FOV of 180 will flatten and place the canvas plane in line with the view, causing no motion in the Z direction. Negative values of FOV will cause the translation_z instructions to invert, moving in an opposite direction to the Z plane, while retaining other normal functions.A value of 30 fov is default whereas a value of 100 would cause transition in the Z direction to be more smooth and slow. Each type of art and context will benefit differently from different FOV values. (ex. “Still-life photo of an apple” will react differently than “A large room with plants”)
FOV also lends instruction as to how a MiDaS depth map is interpreted. The depth map (a greyscale image) will have its range of pixel values stretched or compressed in accordance with the FOV in such a fashion that the illusion of 3D is more pronounced at lower FOV values, and more shallow at values closer to 180. At full FOV of 180, no depth is perceived, as the MiDaS depth map has been compressed to a single value range.
In image processing, bicubic interpolation is often chosen over bilinear or nearest-neighbor interpolation in image resampling, when speed is not an issue. In contrast to bilinear interpolation, which only takes 4 pixels (2×2) into account, bicubic interpolation considers 16 pixels (4×4). Images resampled with bicubic interpolation are smoother and have fewer interpolation artifacts.
As noted above, video input animation mode takes individual frames from a user-provided video clip (mp4) and uses those sequentially as init_images to create diffusion images.
During Video Input mode, users may select to also include an additional video to be used as a mask. Frames will be extracted for both the video init, as well as the video mask, and used in conjunction. Now you can be a fire-mage (or an anime girl, whatever you like) without changing the rest of the environment!
Dynamic masking demo (sorry for the quality, had to compress it to fit on Github. Visit the Discord server for the full version):
The mask used:
FYI: video input does not work with cadence. It ignores your cadence values.
when interpolate_key_frames = true, then the numbers in front of the animation prompts will dynamically guide the images based on their value. If set to false, will ignore the prompt numbers and force interpolate_x_frames value regardless of prompt number
Currently only available in 2D & 3D mode, the timestamp is saved as the settings .txt file name as well as images produced during your previous run. The format follows:
yyyymmddhhmmss – a timestamp of when the run was started to diffuse.
Remember that in 2d animation mode, DSD is shifting the CANVAS of the prior image, so directions may feel confusing at first.
(0|-3 to 3) (2D only) Rotates image by () degrees each frame. Positive angle values rotate the image counter-clockwise, (which feels like a camera rotating clockwise.)
(2D only) (1.10|0.8 – 1.25) Scales image by () percentage each frame. zoom of 1.0 is 100% scaling, thus no zoom. zoom values over 1.0 are scale increases, thus zooming into an image. 1.10 is a good starting value for a forward zoom. Values below 1.0 will zoom out.
In 2D mode
(0|-10 to 10) In 2D mode, the translation parameter shifts the image by () pixels per frame.
Recall that in 3D animation mode, there is a virtual 3d space created from the prior animation frame, and a virtual camera is moved through that space.
(Image CC BY 4.0 by Joey de Vries, from https://learnopengl.com)
3D Rotations follow the diagram above, with positive values following the direction of the arrows. NOTE: DSD are measured in degrees.
(3D only) (0|-3 to 3) Measured in degrees. Rotates the camera around the x axis, thus shifting the 3D view of the camera up or down. Similar to pitch in an airplane. Positive rotation_3d_x pitches the camera upward.
(3D only) (0|-3 to 3) Measured in degrees. Rotates the camera around the y axis, thus shifting the 3D view of the camera left or right. Similar to yaw in an airplane. Positive rotation_3d_y pans the camera to the right.
(3D only) (0|-3 to 3) Measured in degrees. Rotates the camera around the z axis, thus rotating the 3D view of the camera clockwise or counterclockwise. Similar to roll in an airplane. Positive rotation_3d_z rolls the camera clockwise.
In 3D Mode ONLY
(0|-10 to 10) In 3D mode, translation parameters behave differently than in 2D mode – they shift the camera in the virtual 3D space.
The distance units for translations (x, y or z) in 3D mode are set to an arbitrary scale where 10 units is a reasonable distance to zoom forward via translate_z. Depending on your scene and scale, you will need to experiment with varying translation values to achieve your goals.
After your prompt and settings are ready, visit the Do the Run! code cell near the bottom of the notebook, edit the settings, then run it. DSD will start the process, and store the finished images in your batch folder.
Users may now select an “override” function that will bypass all instructions from the notebook settings, and instead run from a settings.txt file previously saved by the user. This function is reverse compatible to v04. This feature does not auto-populate settings into your notebook, however it directly runs the instructions found within the .txt file.
([Width, Height]|limited by VRAM) desired final image size, in pixels. You can have a square, wide, or tall image, but each edge length should be set to a multiple of 64px. If you forget to use multiples of 64px in your dimensions, DSD will adjust the dimensions of your image to make it so.
The model was trained on a 512×512 dataset, and therefore must extend its diffusion outside of this “footprint” to cover the canvas size. A wide landscape image may produce 2 trees side-by-side as a result, or perhaps 2 moons in either side of the sky.. A tall portrait image may produce faces that are stacked instead of centered.
Significantly larger dimensions will use significantly more memory (and may crash DSD!) so start small at first.
I tend to use 448×704 as a starting resolution for portirate style images, anything taller can lead to double head situations.
Resolution of 512×832
Let us know what works well for you.
Things to remember with steps values:
Considering that during one frame, a model will attempt to reach its prompt by the final step in that frame. By adding more steps, the frame is sliced into smaller increments as the model approaches completion. Higher steps will add more defining features to an output at the cost of time. Lower values will cause the model to rush towards its goal, providing vague attempts at your prompt. Beyond a certain value, if the model has achieved its prompt, further steps will have very little impact on final output, yet time will still be a wasted resource. Some prompts also require fewer steps to achieve a desirable acceptable output.
During 2D & 3D animation modes, coherence is important to produce continuity of motion during video playback. The value under Motion Parameters, “strength_schedule” achieves this coherence by utilizing a proportion of the previous frame, into the current diffusion. This proportion is a scale of 0 – 1.0 , with 0 meaning there’s no cohesion whatsoever, and a brand new unrelated image will be diffused. A value of 1.0 means ALL of the previous frame will be utilized for the next, and no diffusion is needed. Since this relationship of previous frame to new diffusion consists of steps diffused previously, a formula was created to compensate for the remaining steps to justify the difference. That formula is as such:
Target Steps – (strength_schedule * Target Steps)
Your first frame will, however, yield all of the steps – as the formula will be in effect afterwards.
A numerical prompt weight feature has been added to deforum as a selectable feature. When enabled, the run will interpret the values and weights syntax of the prompt for better control and token presence. Bonus: weights values adhere to MATH expressions for even more control.
This feature allows you to run a batch on your prompt or prompts and have it generate various images with different seed values and then output this as a grid if you enabled this.
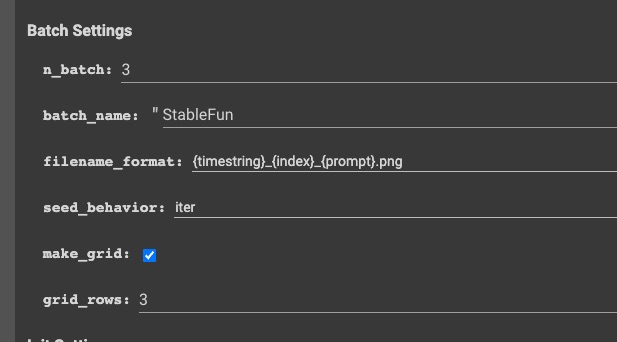
You can play around with this value and also adjust the seed_behavior to see how the results turn out. Remember this is all about experimenting so take the time to test this feature out.
Settings Details:
make_grid, will take take still frames and stitch them together in a preview grid
grid_rows, arrangement of images set by make_grid
You can use your own custom images to help guide the model to try to mimic more of the look and feel from the image you want.
Note: even with use_init unchecked, video input is still affected.
Note: in ‘none’ animation mode, a folder of images may be referenced here.
Note: lighter areas of the mask = no diffusion, darker areas enforce more diffusion
Examples to come showing off the init images, init videos and mask features!
I want to run DSD on my super powerful home PC with the wicked smart graphics card.
Info coming soon, but I highly recommend Visions of Chaos Windows App for the Swiss Army knife of ML and AI Art scripts! I should have a tutorial on this soon. IF you do go this route follow the instructions verbatim!
DSD will store your your images and videos into your google drive in:
\My Drive\AI\StableDiffusion\<date>\folder name based upon the batch_name setting
You can browse to this directory in a second window to monitor progress, and download the entire folder when your project is complete.
That’s all folks!
Here are some useful links:
Deforum Stable Diffusion User Discord (JOIN THIS!)
Most of our guide is a combination of these, which usually has all the latest info.
Credit is due to the respective authors.
Please note this was current version as of September, 2022. We will try to keep this updated and also add our own imagery based upon settings we find.
If you find something out of date or needs to be address please reach out to us on our contact page.
***Original Settings Doc which is ever evolving is located here. **
So please refer to this for the latest if we haven’t updated ours to avoid questions, we just used the document as reference data to generate this document and add our own tidbits from things we have learned.